
STAGES IN A POOL BUILD
 Building a pool is a huge project that takes a bit of time, even more work, and a ton of expert planning. At Aqua Pool, we’ve been providing pool design and installation services to Southern New England for over forty-four years. We wanted to take a minute though to help familiarize you with all of the stages involved in a full pool building project starting from the moment you have a completed and approved design in hand:
- Pre-construction meetings / Permitting
After the permits are approved, time to meet at the site, go over access for machinery, make any final decisions, at set the final elevation, etc. etc. - Site Stake out and Digging Time
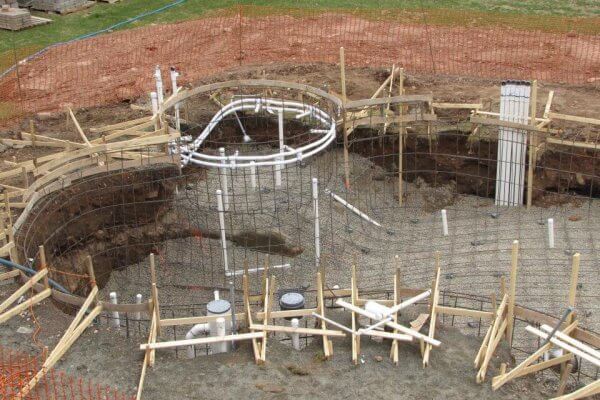
Next up is excavation time! All the “forms” are set up and the heavy machinery is brought in. The hole for your future pool is dug deep into the ground of your backyard. - Pre-Plumbing (Laying the First Pipes)
Pre-Plumbing is next up on the installation list. At this stage, plumbers will install piping that will live beneath your pool and in the walls of the gunite (spa jets, skimmers, suction outlets, and in-floor cleaners). - Steel Reinforcements
After the plumbing is taken care of, it is time for reinforcements. This means that the excavation site will be reinforced with steel rods wired together to lend support to the structural integrity of your pool. - GUNITE! – Shelling and Curing
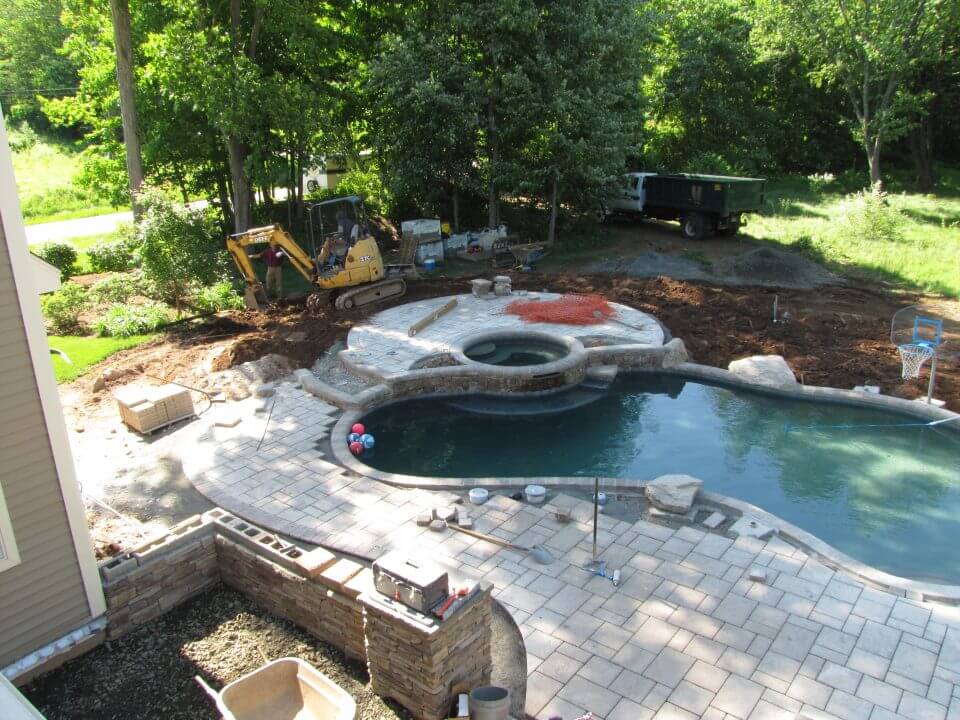
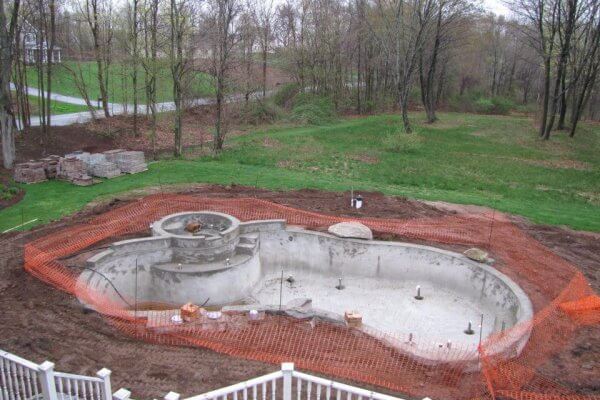
Next is the application of the pool shell which adheres to the steel reinforcements already in place. This gunite layer, a mixture of cement, sand, and water, requires attention post-application in terms of watering with a hose several times a day for the next ten days or so to help the material cure correctly. You can now see all the steps, benches, and full shape of your pool! - Coping and Tile
This stage is a bit more fun to watch since your pool is really starting to take shape now. Coping is the installation of the material above the tile, or the lip of the pool. It is meant to help delineate the pool structure from the pool deck. Whatever color and tile type you have chosen will be installed next giving you a glimpse of what your future pool will look like. This is when you can go ahead and start imagining that crystal clear water!
OR
- Finish Plumbing
Setting of the pumps, filters, heaters and other mechanical equipment – all those important pieces that make this beautiful body of water function properly. - Gas Lines and Electricity
Gas and electric line installation, depending upon your pool’s configuration, are the next steps. Here licensed electricians install the necessary components for your pool’s lights, filtration system, and heater (if chosen) to function properly. Home automation systems are set up and connected to the home’s wifi, etc. - Finishing
One of the final steps is finishing the surface of your pool. This means that the once dirt hole will now look like a pool complete with white plaster or other chosen surface to finish out the look and feel of the project. - Fill Up
Now running the hose, or trucking in the water to fill the pool up. Depending upon the interior finish of the pool, there are some strict instructions to follow for filling a brand new pool so speak with the pool builder for sure.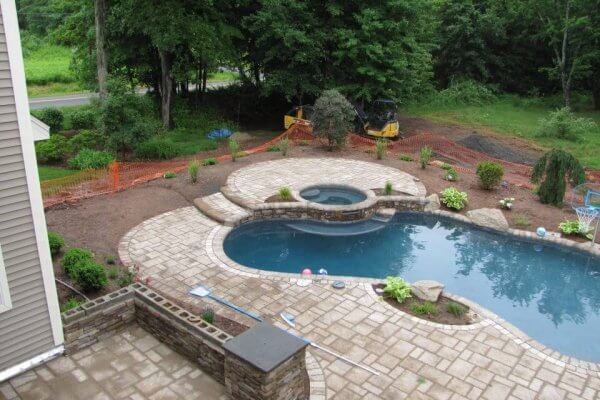
- START-UP!
The pool equipment should be turned on with a qualified technician (for that “first tim), and everything should be tested to ensure it is working properly. The technicians are there for several hours to get it all up and running and then educate you on how to use and maintain the pool. Voila your pool build is complete!ENJOY!